Mixed Media Artist

I work primarily in acrylics and collage.I use collage and beewax in my assemblage works and am now completing several shrines using found objects. I have been experimenting with encaustic collage and have found the medium very challenging. The paint is a combination of melted beeswax and pigment. A small amount of damar resin is added for hardness. I mix these paints myself and while painting all custom colors are mixed directly on a hot palette.
I will share my progress with this exciting medium with photos of work in progress and finished pieces.

Showing posts with label torching wax. Show all posts

Friday, May 5, 2017

News on the Encaustic Front

I am happy to say the little painting that was shown on the last post won an award of merit.

Arrowmont School of Arts and Crafts has a prestigious show biennially in the main gallery of the school. It is only open to Sevier County Residents and has gained popularity through the years.
This year's juror was Ms. Teri Alea. She is the Executive Director for Tennessee Craft, a leading statewide craft organization which provides professional development for craft artists across the state.

I entered "The Jester" and received one of three of the merit awards. It was exciting for me to be recognized in my own community for my artwork. Here I am with my painting.


The "Jester" is offered for sale.
Please visit my etsy store: 


Please visit my etsy store: 

Monday, August 8, 2011

New Encaustic Work

The demonstration Friday night was a huge success and here you'll find some of my work that is featured this month at The Twigs and Leaves Gallery in Waynesville, North Carolina.


Bridging the Gap
7" x 9"
Encausti and Oil on panel

Captured
7" x 9"
Encaustic on panel

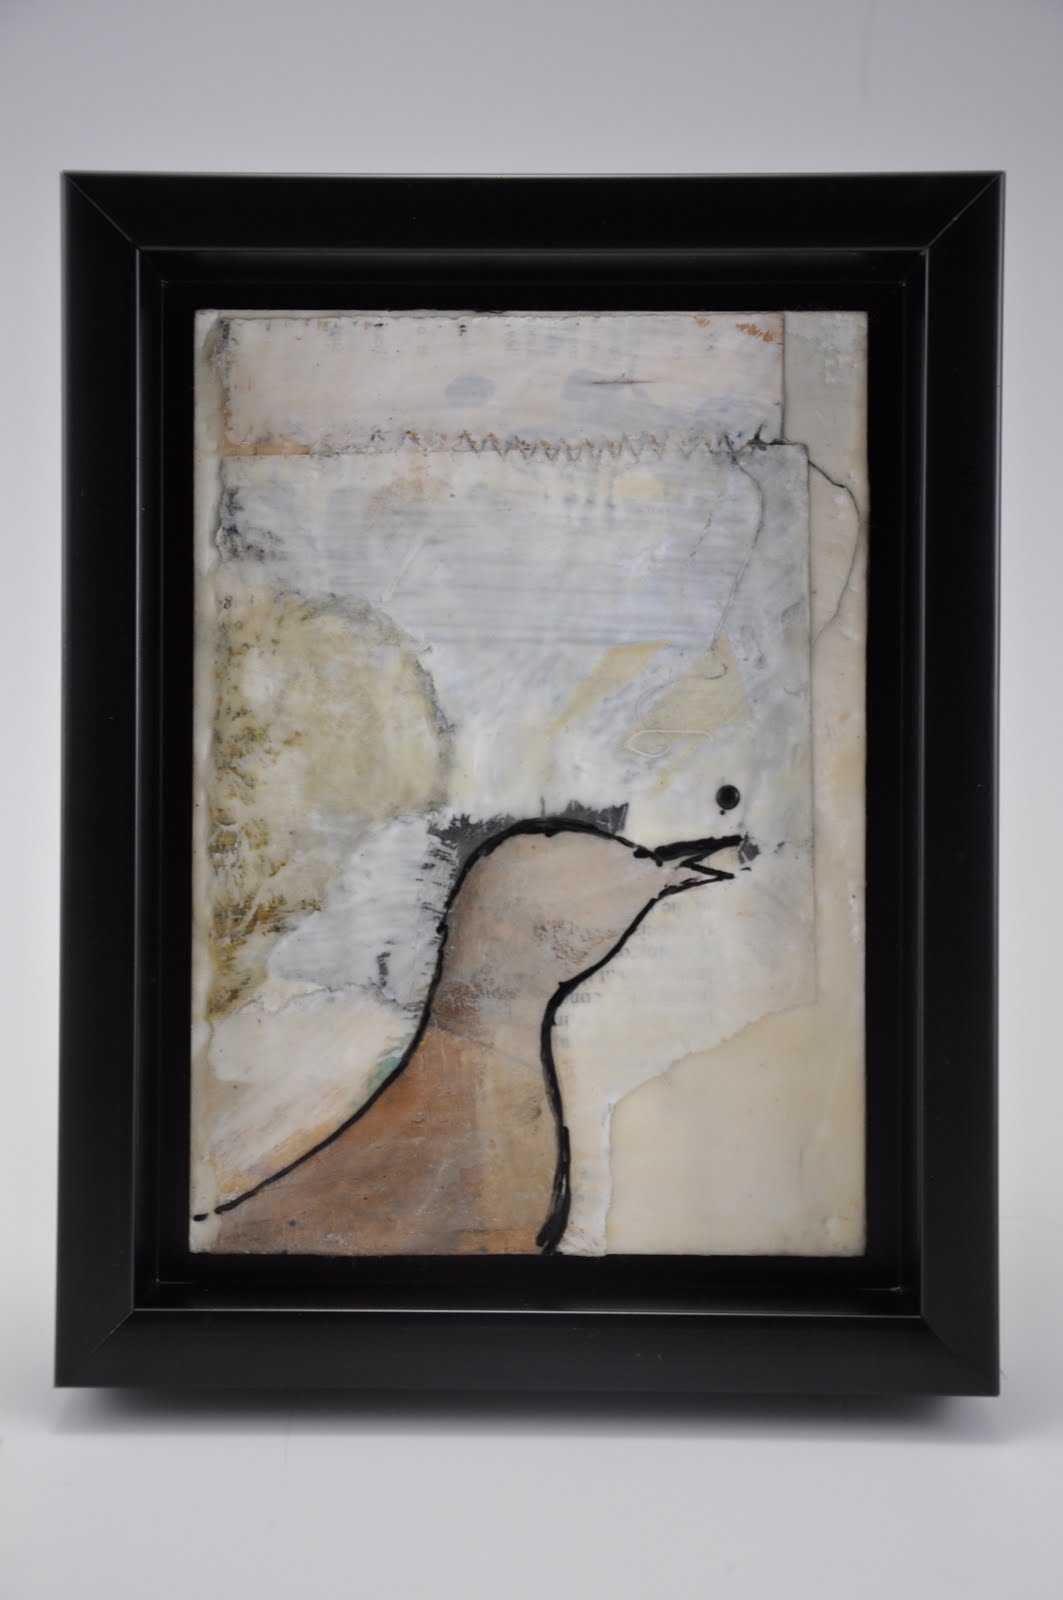
A Singing Bird
6" x 8"
Encaustic Collage on panel

Plumage
6" x 6"
Encaustic on cradled panel

Dragonfly Summer
8' x 8"
Encaustic on cradled panel


Urban Landscape
26" x 26"
Encaustic and oil on panel

Olive Trees
8" x 8"
Encaustic on cradled panel
Still Life
6" x 8"
Encaustic and oil pastel on panel
'

Monday, May 30, 2011

Photographer, Cara Barer


Look at these amazing book sculptures by photographer, Cara Barer. Unfortunately the photos are not very clear and these deserve a closer look. Please go to her website  http://www.carabarer.com/ Select the last category, Sculpture, to see how lovely these are on her site.
After reading her story I learned her inspiration came from a public phone book. These book pages are stiffened and shaped with melted beeswax, so again, another unique way to use encaustic. Without speaking to her I don't know her process, but I can see the use of beeswax in many of her sculptures.  I was so impressed with the soft forms and flowing nature of these book pages.

Wednesday, April 20, 2011

Getting A Little Fresh Air


My portable studio


Painting outdoors is great, as the lighting is fantastic and I don't have to worry about breathing any wax fumes.
There is an abundance of fresh, spring air for me to breathe.


My Inspiring View
Paper is a great porous surface to paint on when using wax. I am working on small 6x8 pieces of masonite with watercolor paper glued to the surface. The glue I use is white PVA and works very well, although care should be taken not to get any glue on the paper, since it is a plastic based adhesive. I press these under heavy books and wait 24 hours before painting.


I like to break up the surface of the white paper before I begin with the first layer of wax. I have used a shiva oil paint stick to draw lines. A sharpie marker, india ink or oil pastels also work well for drawing. It is important to remember not to use any acrylic paints or inks.


Under painting


On this one I have used watercolors to break up the surface with an under painting of color blocks. 


Imagery can be added after the wax has been applied as in the work above. The insect is a transfer I made with a toner copy. A thin layer of clear medium is brushed on the transfer.


I added these lines with a sharpie on top of the wax. A layer of clear encaustic medium is brushed over the surface, this will keep the marker from rubbing off. I love the way it always smears a little and softens the look of the line.


Saturday, August 28, 2010

Pouring the Wax On

This is another painting trying out more new techniques. I taped the sides of my board with masking tape to form a barrier all around the piece. It stuck up about an inch from the surface, and the first layer of clear encaustic medium was poured on. After cooling it slightlty I embedded painted raffia ribbon mesh in spots. Then poured on another thin layer of clear encaustic medium. At this point there was no color added. I began using colored wax and oil pastels (the red scribbles) to layout the design. The buterfly image is a laser copy I cut out and collaged on with a coat of clear on top. The next layer has the black shapes transfered on the surface and a thin layer of clear painted over. The beautiful white lacy efferct is the shellac application, this time painted very thinly, and lightly hit with the torch. The final layer is applied 24 hours later over the shellac to set it. I tinted clear shellac with white oil paint to get the color. Amber shellac can be used as is out of the can and gives the burnt sienna look as shown im my previous post,"The Day the Winds Came"  I am really pleased with the white lacy look of the shellac and the way it brings the elements together. I will definitely try other colors and methods of application. I like the oil pastel drawing as well and want to do more of that. But I don't know about the pouring, it was a lot of work to keep it level and I don't see where it made much of a difference in the finished product.